Overview
The goal of this article is to walk you ( the reader) through a step-by-step setup of an Arista Virtual Lab environment on an EVE-NG PRO emulator running on a VMware ESXI 6.7 server (Installation of Eve-NG Pro will be the topic of a different article). Assuming that you already have Eve-NG Pro running on en Environment of your choice (whether it is VMware ESXi, KVM or any cloud vendor) we will start from the download of an Arista virtual image to testing a very basic lab.
Download Arista vEOS router image
To download Arista vEOS (Virtual Extensible Operating System), you can follow the steps below:
- Go to Arista Webpage: https://www.arista.com/
- In the top menu, click on Login and enter your credentials (If you do not have an account yet, in the next windows, please click on Need a User Account to create a new account)

- N.B: If you do not have an account yet, in the windows below, please click on Need a User Account to create a new account

- Once logged in, go to the bottom of the page and click on Software Downloads.

- You must accept the vEOS / cEOS License Agreement in the middle of the page to download this software.

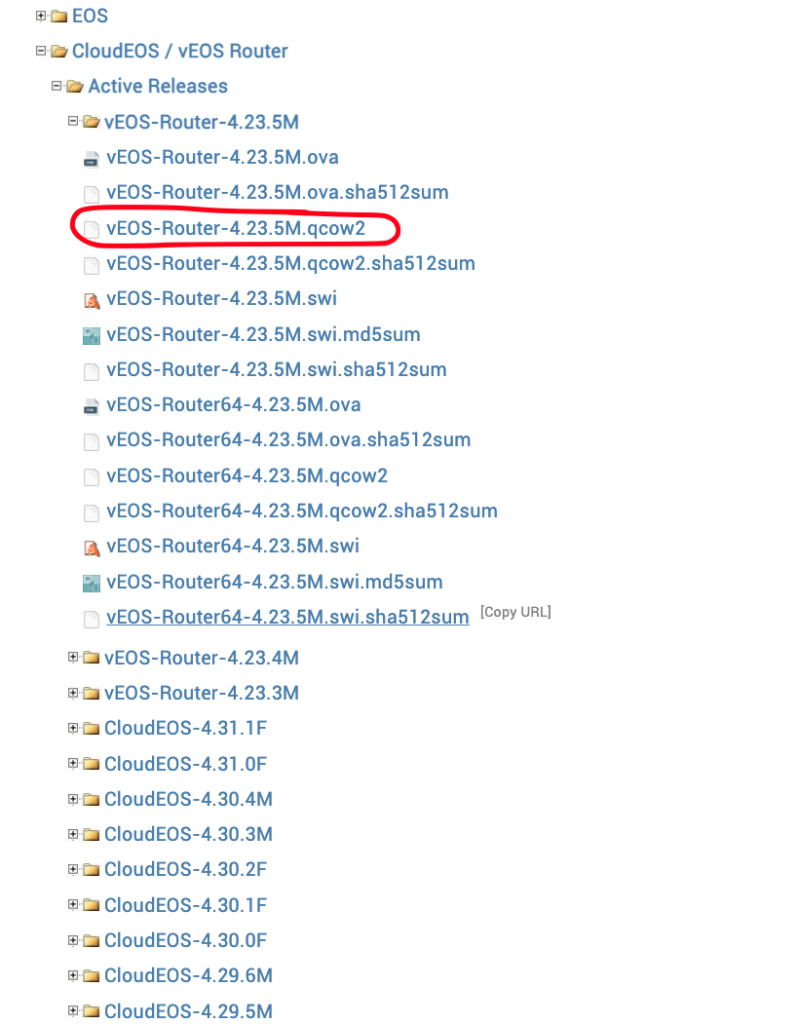
- Per Eve-NG documentation, we are to download vEOS-Router-4.23.5M.qcow2. Click on the image to start the download.

Create Image of Arista in Eve-NG
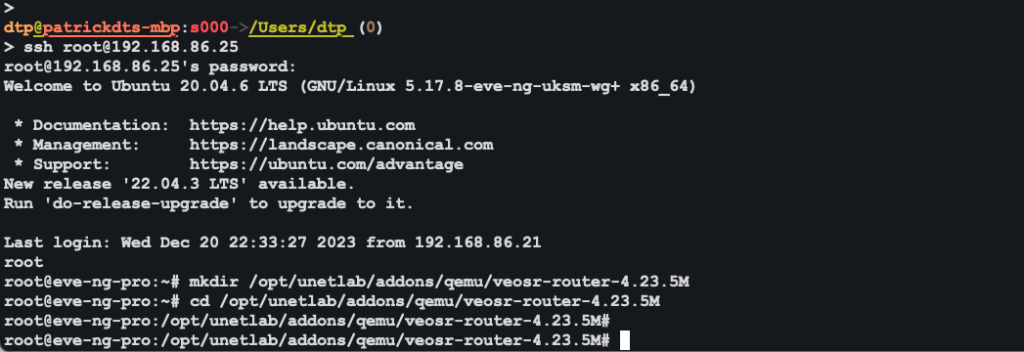
- SSH to EVE and login as root, from cli and create image directory on the EVE’s /opt/unetlab/addons/qemu

- Upload the downloaded KVM vEOS-Router-4.23.5M.qcow2 image to the EVE using for example FileZilla or WinSCP.

- Rename the image vEOS-Router-4.23.5M.qcow2 to hda.qcow2.

- Fix permissions:

Verification
- Log into Eve-NG web interface https://192.168.86.25/legacy/.
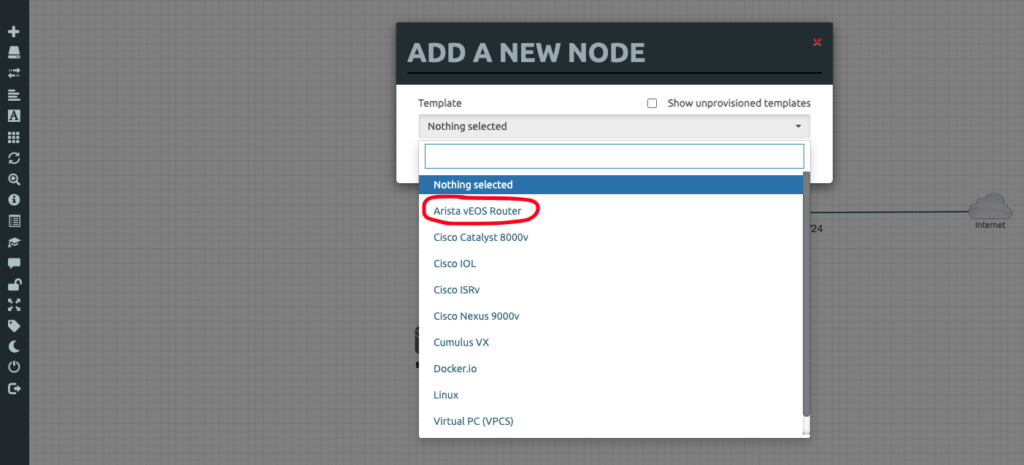
- Click on Add an object.
- select Node.
- You can see that Arista vEOS Router is now present.

