Introduction
As a NetOps Engineer, it is critical for me to be able to have a secure remote access to the devices I support. What would be the Ideal Solution for that you may ask? What about OpenSSH.
OpenSSH (Open Secure Shell) is a freely available and Open Source implementation of SSH protocol family of tools for remotely controlling, or transferring files between, computers in a very secure way.
Installing OpenSSH on Ubuntu Server
How it works
The OpenSSH server component, sshd, listens continuously for client connections from any of the client tools (ssh, scp and sftp). When a connection request occurs, sshd sets up the correct connection depending on the type of client tool connecting. For example, if the remote computer is connecting with the ssh client application, the OpenSSH server sets up a remote control session after authentication. If a remote user connects to an OpenSSH server with scp, the OpenSSH server daemon initiates a secure copy of files between the server and client after authentication. OpenSSH can use many authentication methods, including plain password, public key, and Kerberos tickets. For more information of how SSH works, please check here.
Check if OpenSSH is already installed
To check if OpenSSH is installed, run the command below:
ssh -V
if OpenSSH is already installed, you will see something like this:
Installation of OpenSSH Server & Client
To install OpenSSH client, run the following command:
sudo apt install openssh-client
To install OpenSSH server, run the following command:
sudo apt install openssh-server
Checking status of SSH service
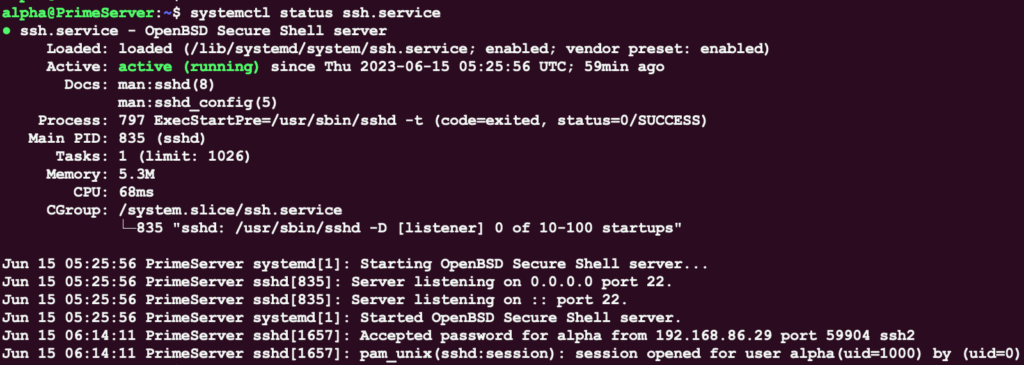
To verify status of the SSH service on an Ubuntu server, run the following command:
systemctl status ssh.service
Example:

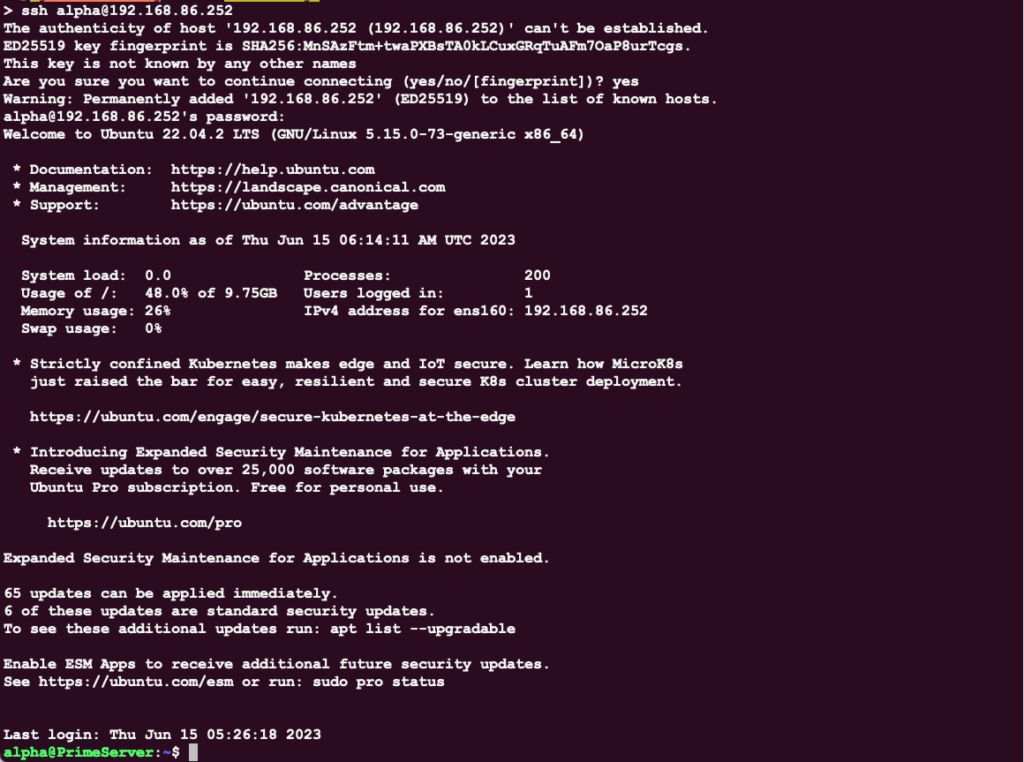
Testing remote access to Ubuntu Server
Let’s say, from my computer, I want to SSH into a Ubuntu server on my lab Network with the following characteristics:
server name = PrimeServer
IP address= 192.168.86.252 /24
username= alpha
password= xxxxxxx

There is one problem: I don’t like waisting time entering passwords or worst trying to remember a password I changed a few hours back due to company policies; and the best way to go around those hurdles is using SSH Keys.
Authentication with SSH Keys
Authentication using SSH Keys is not only best practice and more secure, but it is also very convenient for automation.
How it works
The whole idea behind SSH authentication is very simple. On the SSH client device (The device hosting an SSH client protocol), we have to generate 2 SSH keys: a public key and a private key. The private key will only live on the SSH client device while the public key will be shared with any SSH server device you intend to access from your client SSH device.
Generate SSH keys
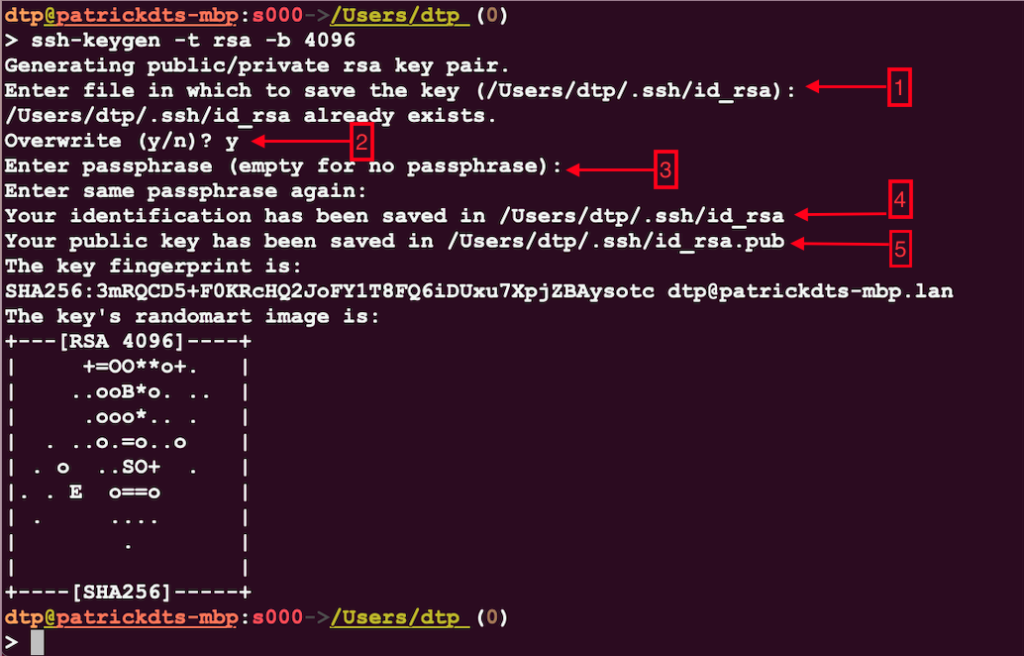
In my Home lab, I want to be able SSH into PrimeServer from my laptop which is a Macbook. For this reason, I will generate the SSH keys on my laptop using the following commands:
ssh-keygen -t rsa -b 4096
Example:

1- This is the default location where the private key, once generated, will be saved (/Users/dtp/.ssh/id_rsa).
2- in the process of generating a new key, an existing key is detected and I chose Y (yes) to override it and replace it with a new one.
3- A passphrase is needed to increase security in case someone has access to your laptop and may want to spy on your private key. For the sake of simplicity of this lab, I chose not to enter any key.
4- a confirmation of the location where my private key is saved (/Users/dtp/.ssh/id_rsa).
5- a confirmation of the location where my public key is saved (/Users/dtp/.ssh/id_rsa.pub).
Share the public SSH key
First we need to copy the file with the public key from the SSH client device (my laptop) over to the SSH server device (PrimeServer) using SCP protocol (which is part of the SSH client family)

Then on the SSH server device, we have to merge the new file imported, that is /home/alpha/.ssh/key_from_patrickdts_laptop with /home/alpha/.ssh/authorized_keys .

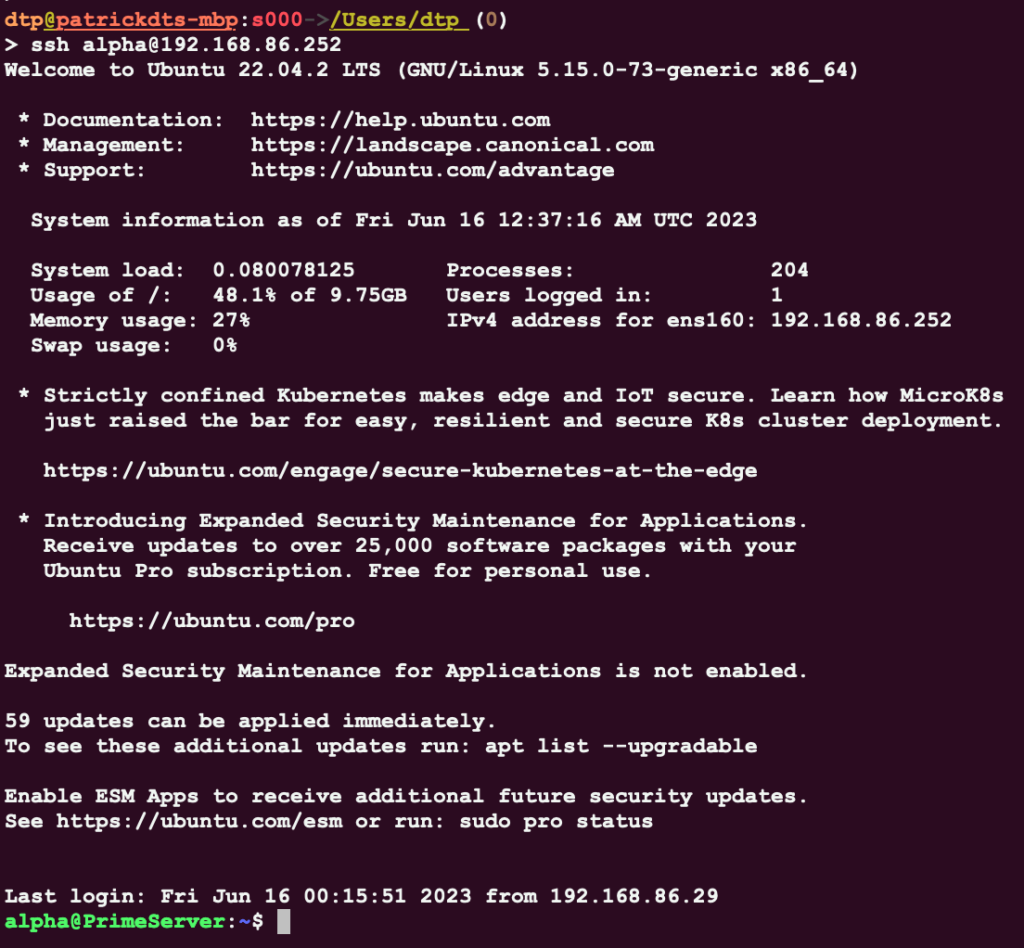
Testing

This is so refreshing 🧘🏽♂️!!!
